*NOTE: This PSI-WEB server was replaced with an AMD/K62 system on 2003-01-29 after around 1 year of continual uptime.
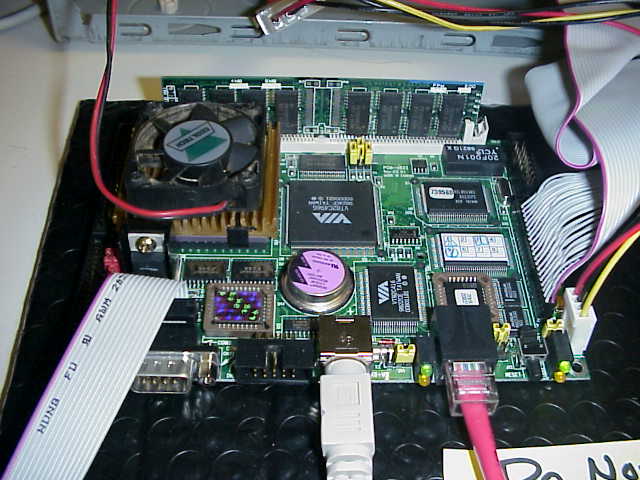
I picked up the board for around $65. It's not PC-104, but does have an expansion bus on it that can be adapted to take PC-104, or ISA. But stock, it comes with neither... and doesn't even have a video card! I maxxed mine out with all it could handle: AMD486DX133, 32MB of EDO RAM, and stuck a 10GB IDE hard drive on it with Linux. Worked like a charm. The whole thing with case, surplus keyboard, paint, power supply and all was probably just under $150 (not counting the $100 hard drive).
To get this system working, I had to install Linux on a standard desktop/server, then modify the IRQ/IO settings for the NIC to match what the biscuit was hard wired for, and then move the hard drive over. Luckily, it all worked and the little server came up first time--on the network. :)
Then later--I telnetted in, installed ssh, and disabled telnet. Then with the help of my friend John Baker, modified lilo, replaced mini-getty with getty, and reconfigured sysinit to allow serial console base lilo control and logins! Oh Joy! :v)
 Overview shot |
 Mobo Closeup |
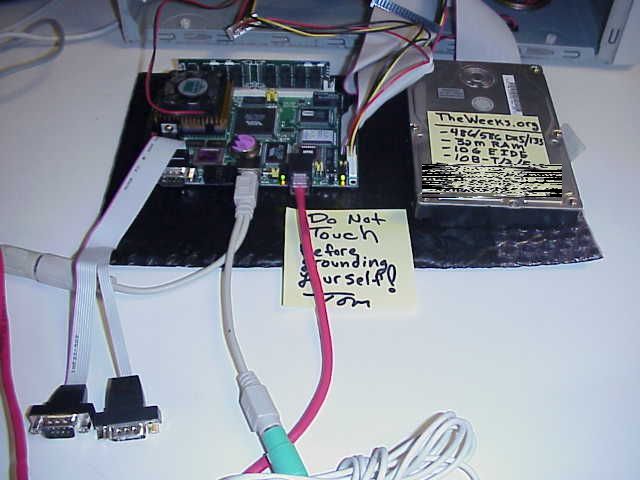
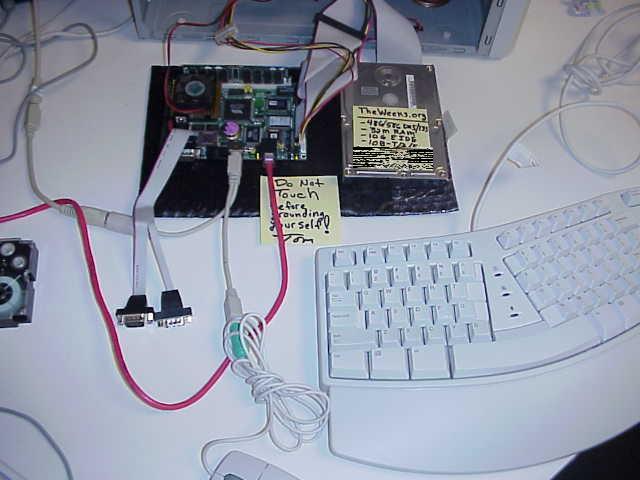
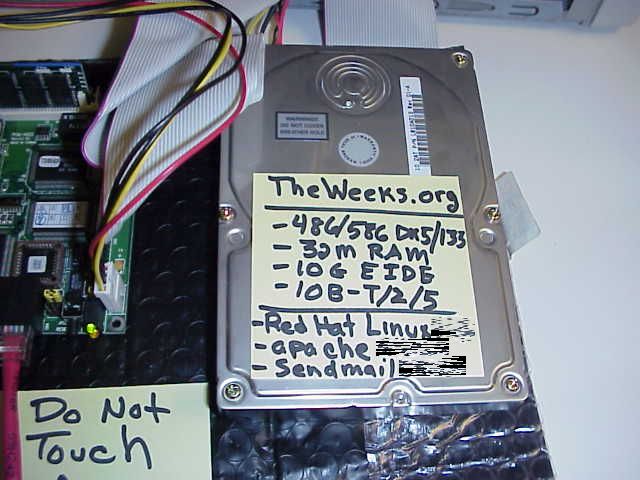 HD & Specs |
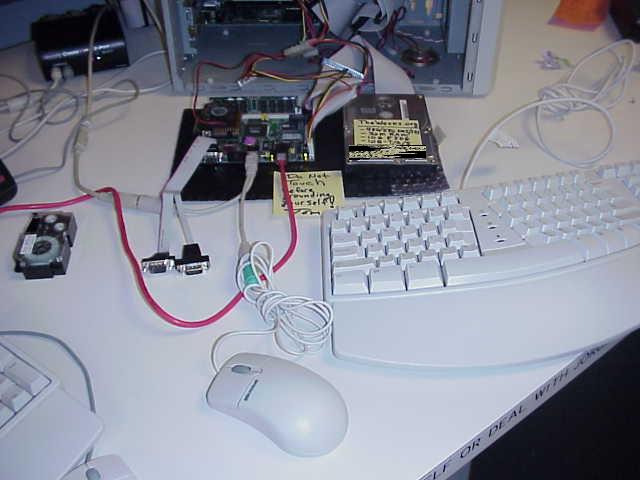 Overview & KB/Mouse |
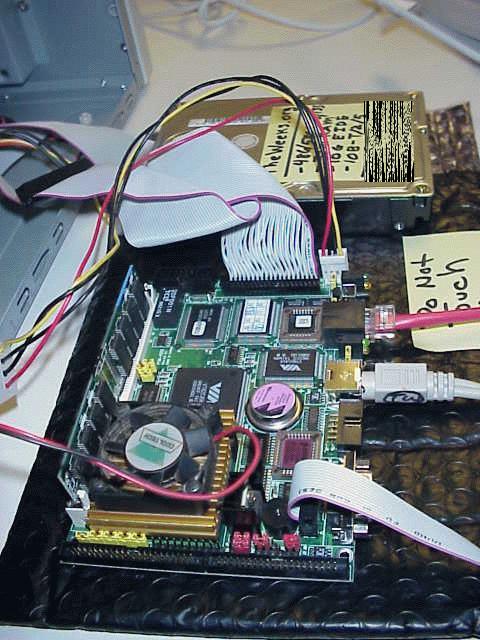
 A Little Closer This give you a real eye for how small this motherboard really is (exact same size as the hard drive!). |
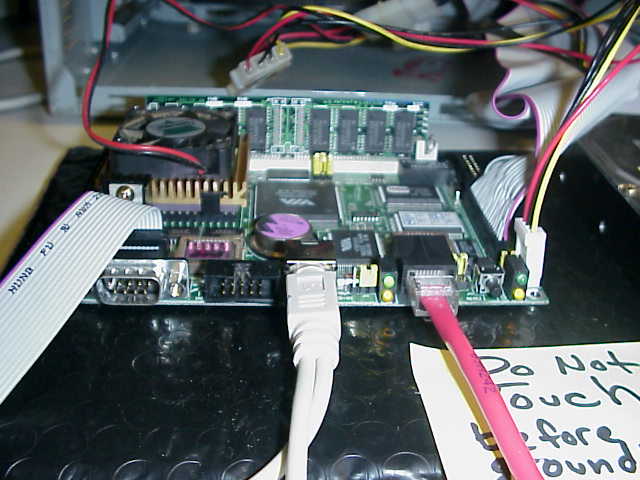 Ports Closeup |
 Side Shot |
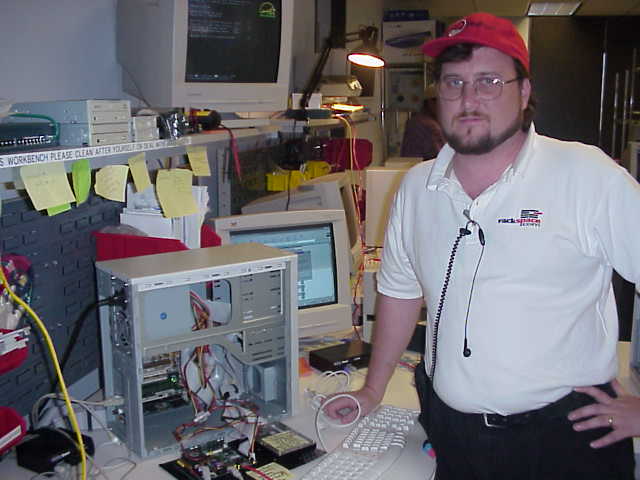 Geek with His Hardware |
 A demo at the local user group. |
 Here I am in the living room, hacking on the case with my handy-dandy Dremel Moto-Tool. "Ooooo... Spaaaarks..." |
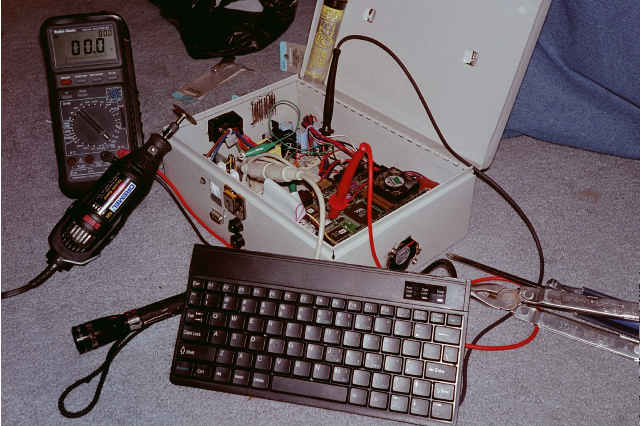 Here are the tools of the trade. My Dremel, Leatherman Pro, Mini-Mag, and a good DMM. Things are starting to shape up as I start bringing it all home! |
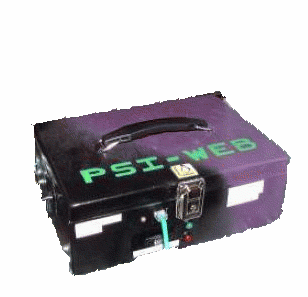
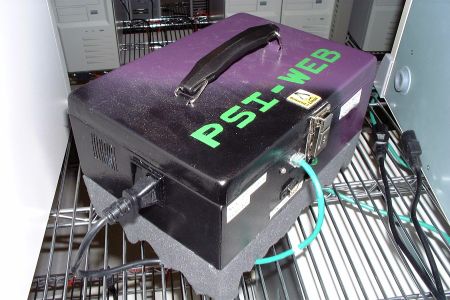
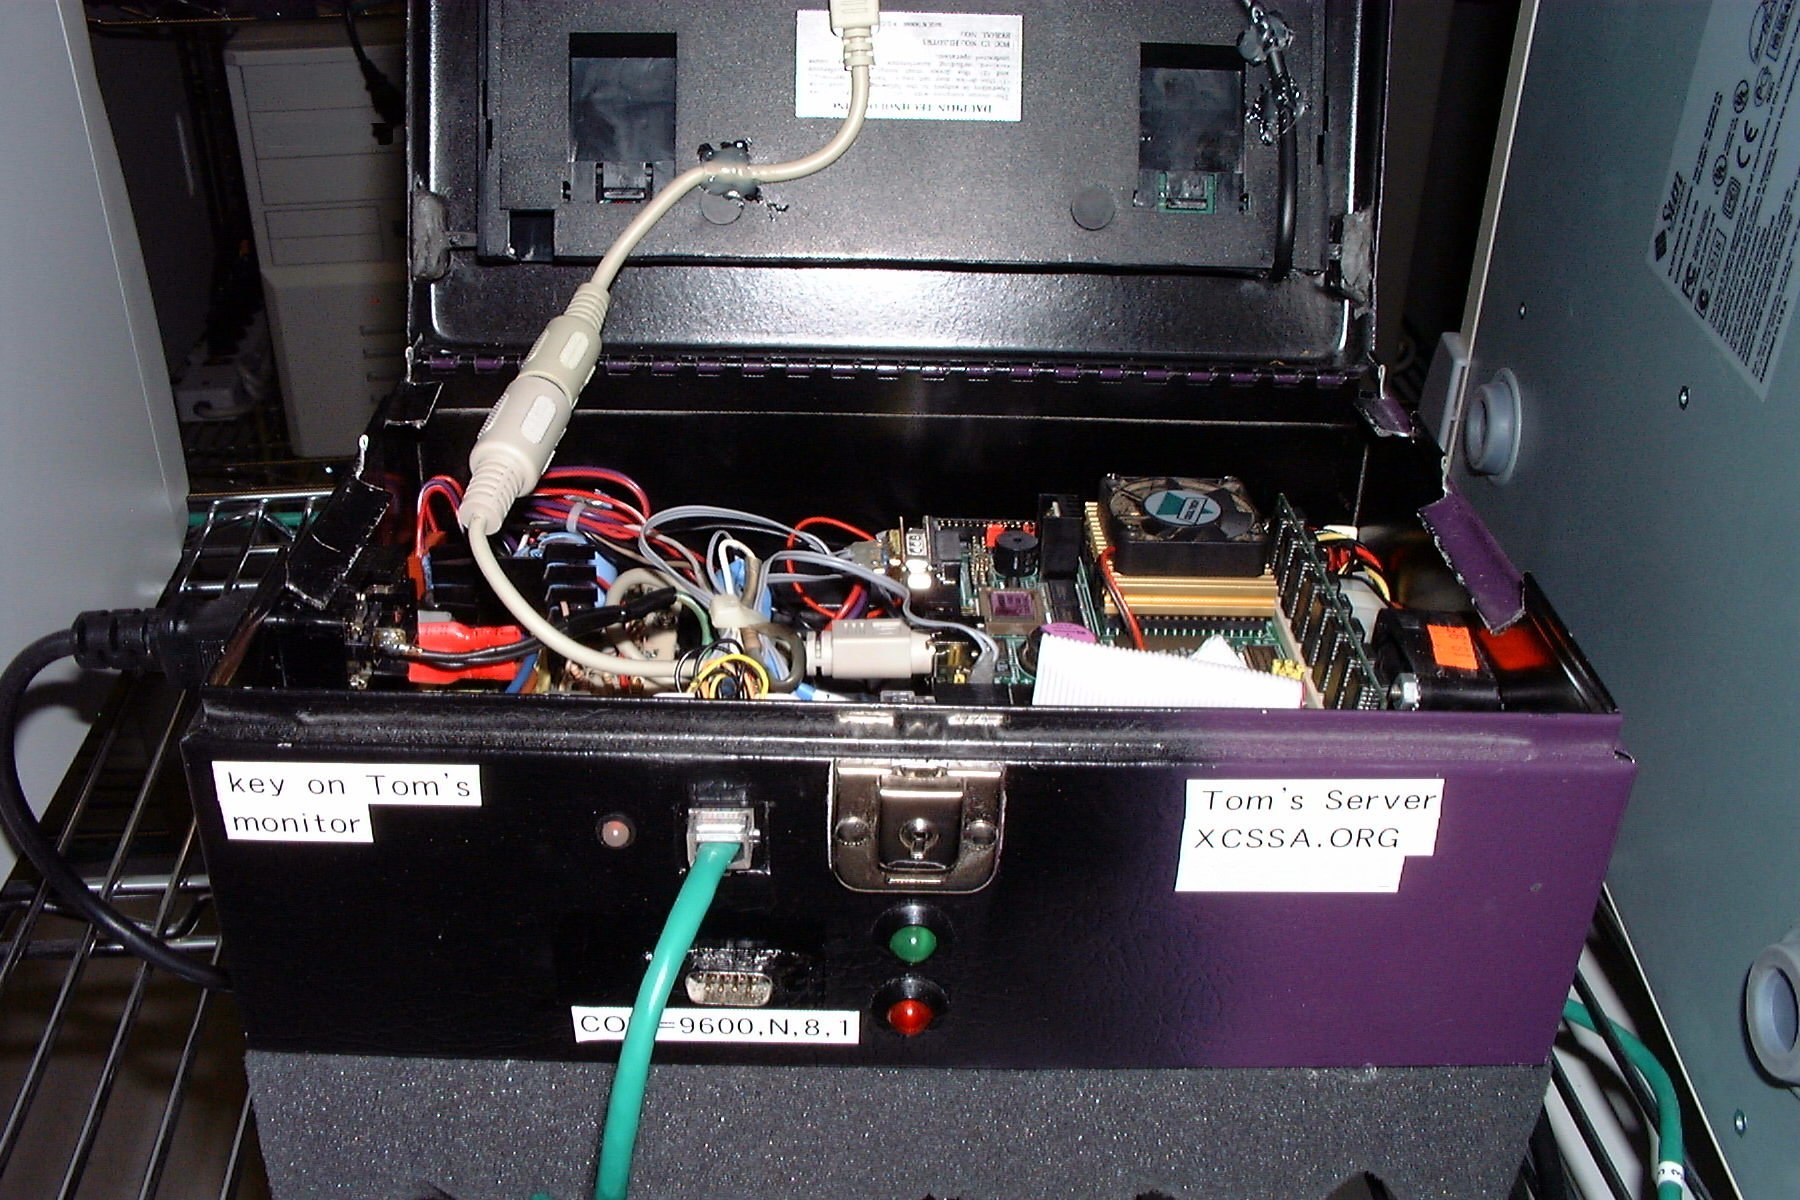
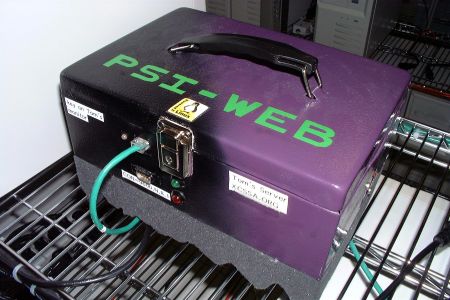 Ahhhhhh.... Nice paint job eh? (for an amateur!)... I painted it myself, and even hand masked the acid green lettering (what a pain!). In the LARGE VIEW, notice the wired CONsole 9600/N/8/1 port, the oversized power and HD LEDs, the bi-color EthNet LED, operational handle, and locking latch. But it's the cool "Powered By Linux" Tux logo than makes her hum! ;) |
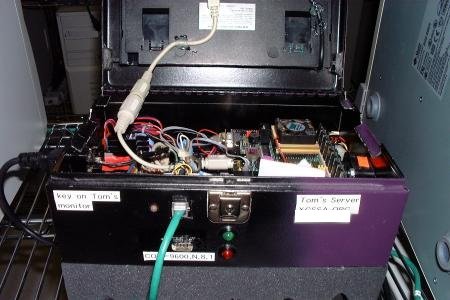 Here are a few shots of the server on line, with its hood open, and keyboard in the vertical position. LARGE VIEW |
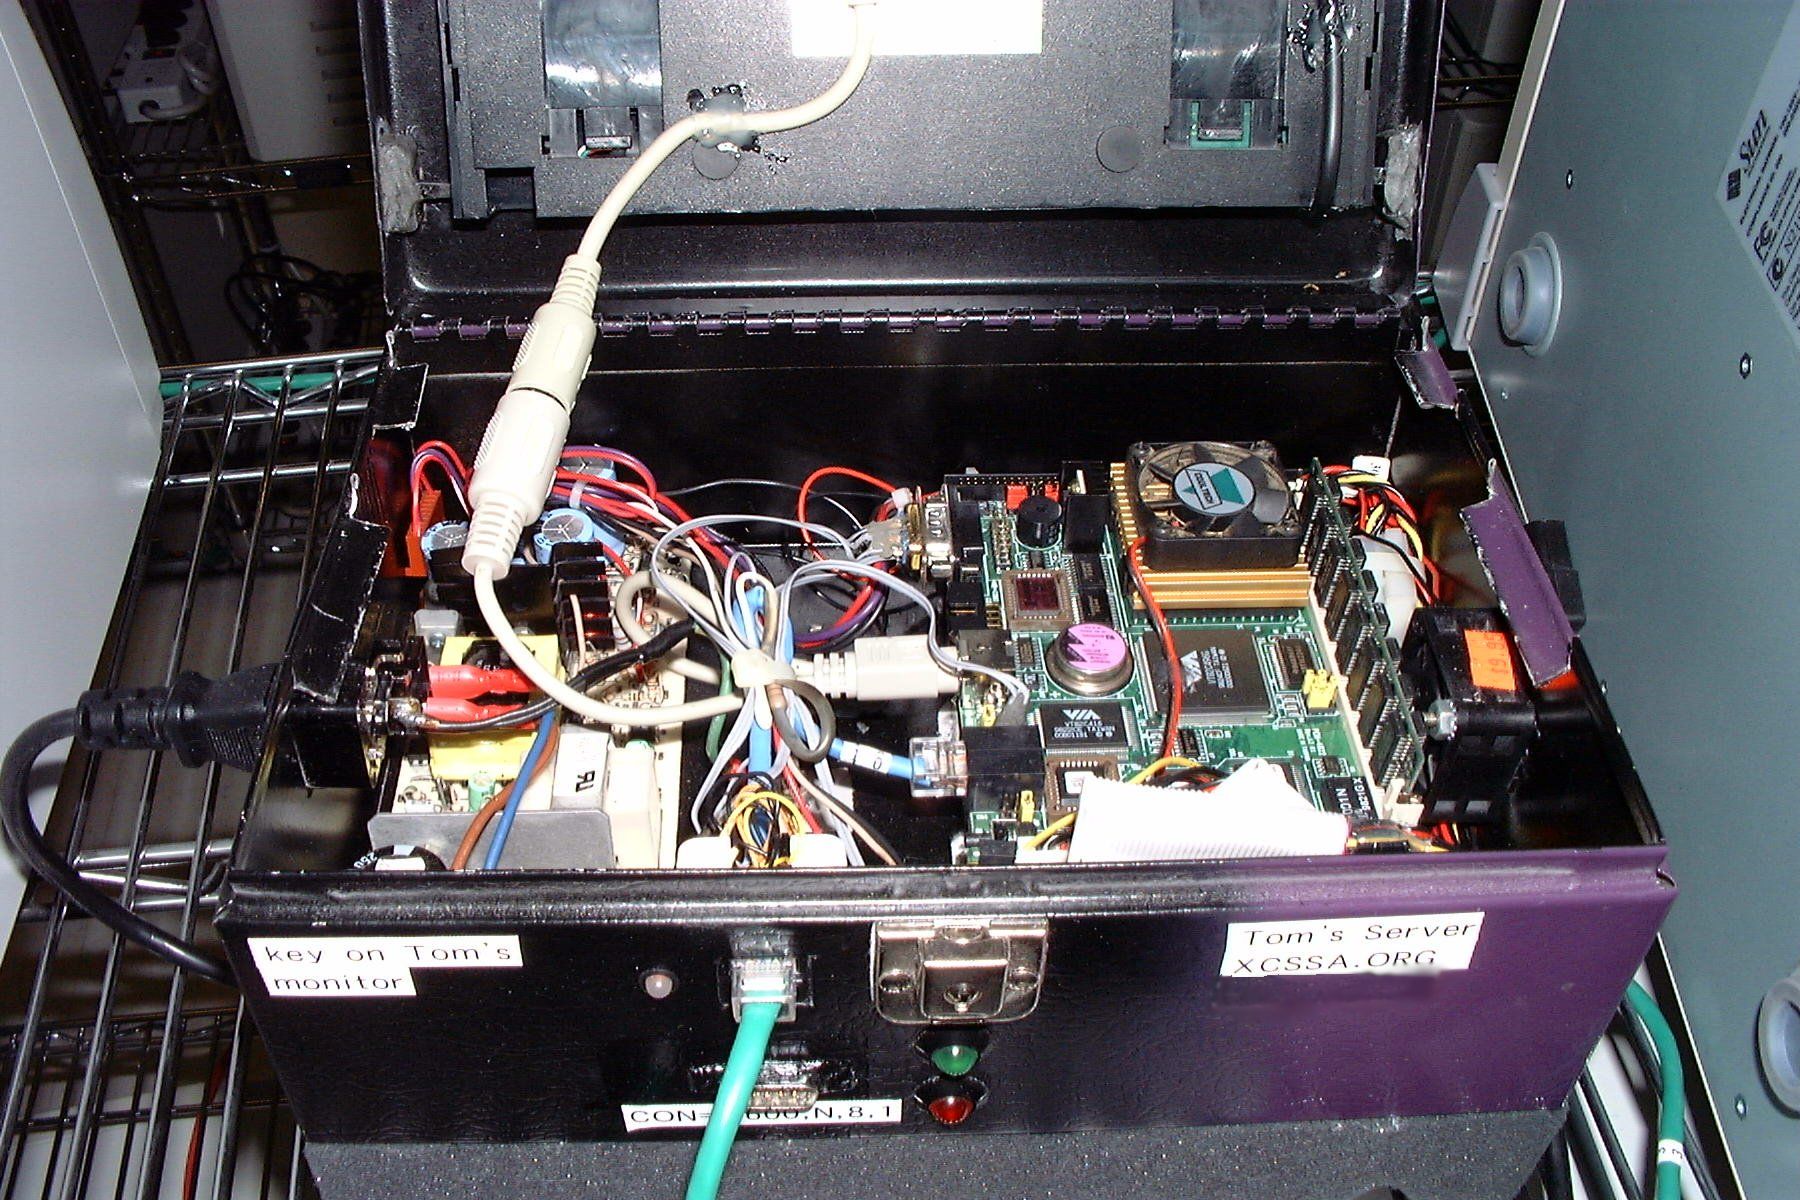
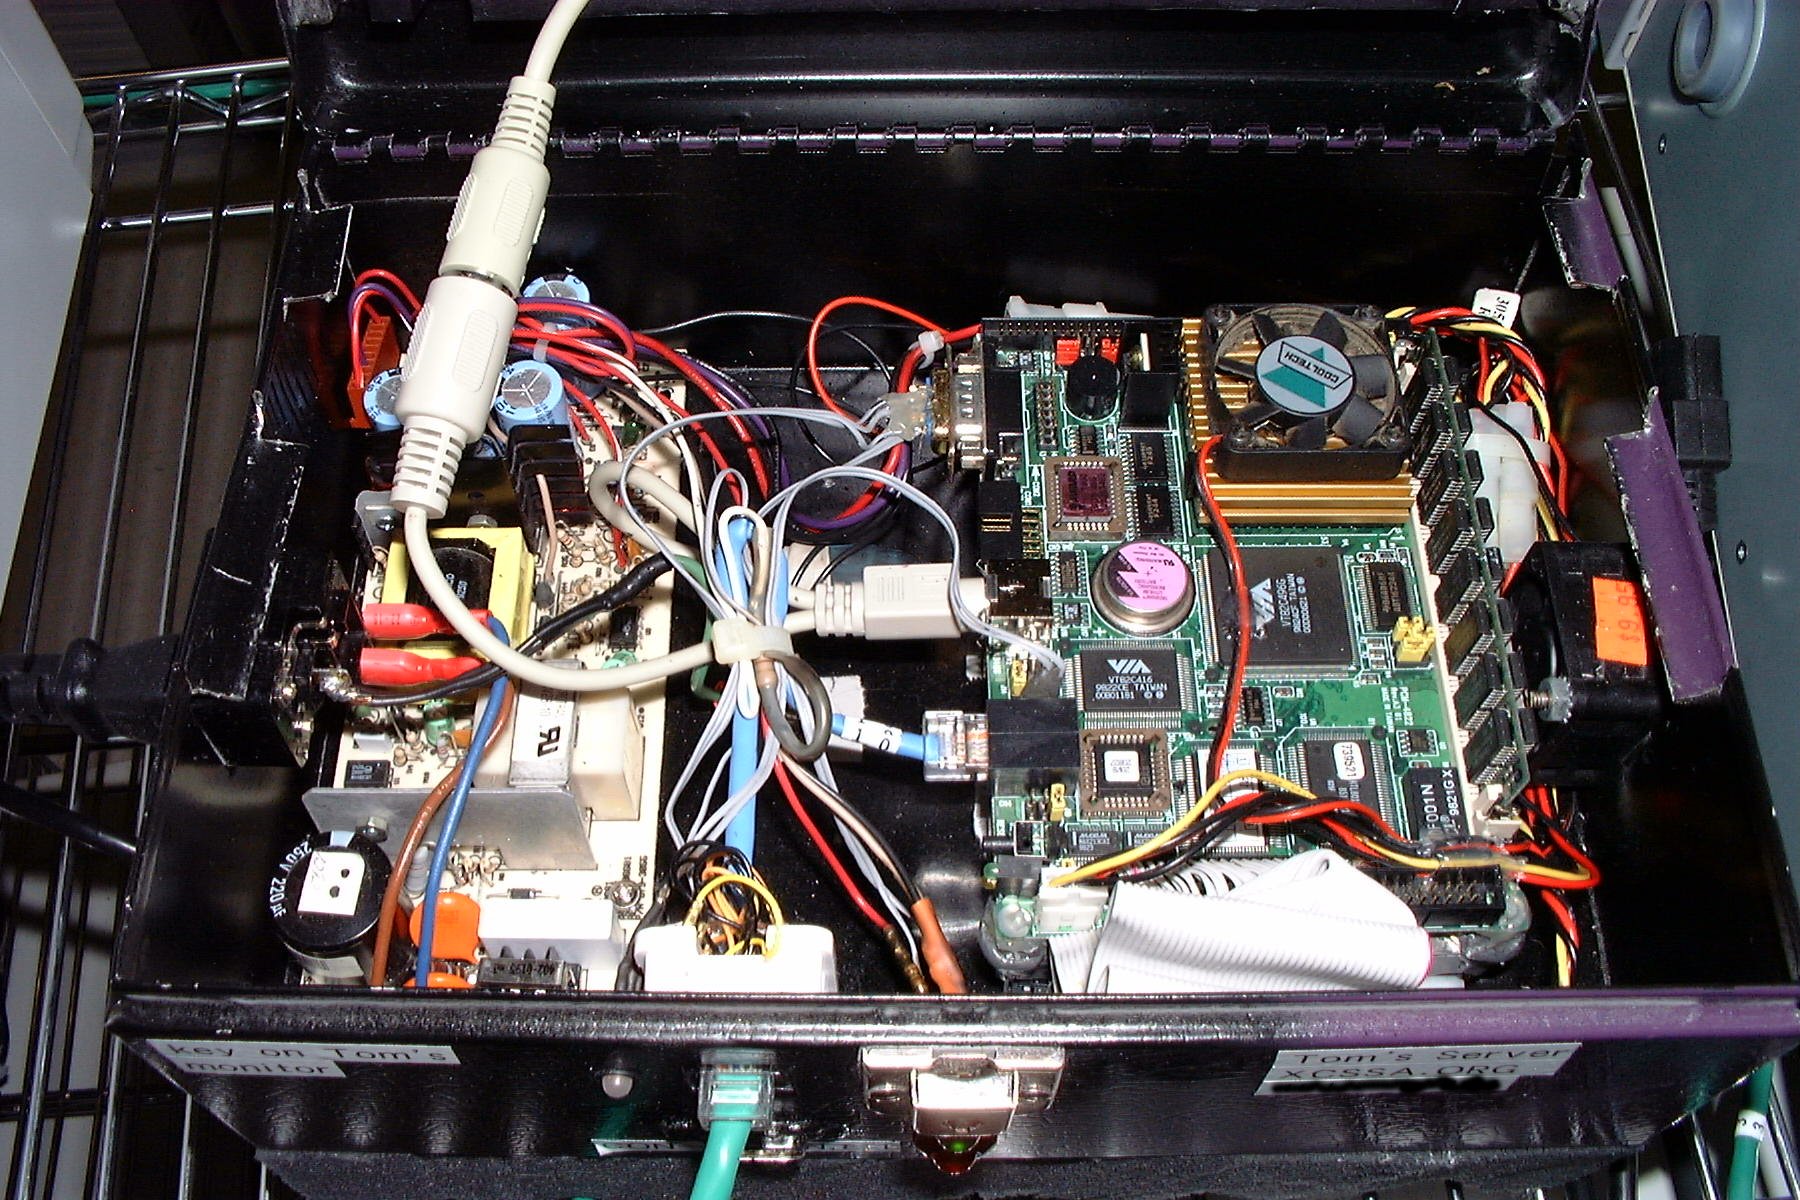
 On the left is the power supply, on the right is the mobo actually mounted atop the 10GB hard drive. Notice the high quality metal work <Shheea!>. If you look close, you can still see the orange price tag on the case fan that I got from A-Tex electronics (right). LARGE VIEW |
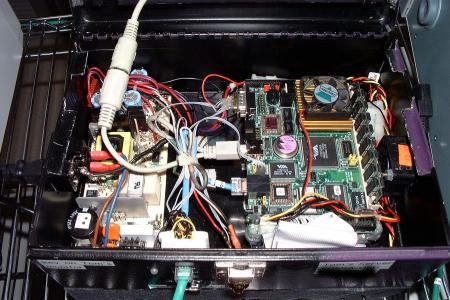 Ooooo... Nice View. :) Good shot of the innards and the wiring job I did between the biscuit-PC motherboard and the outside of the case. Check out the large view to get a really detailed shot... LARGE VIEW |
 See those venting slots? Those were a real pain... even with a Dremel. The one piece power switch, AC receptacle was a pretty cool and easy find--I must say. Hmmm... Looks kinda dusty. LARGE VIEW |
And the Glamor Shot. ;) The foam rubber on the bottom was to keep shock and vibration from damaging my HD platters while running. This is because the HD is actually mounted to the bottom of the steel cash box, and shock was an issue (in my mind at least). It also was a no-brainer for heat dissipation and grounding. LARGE VIEW | |
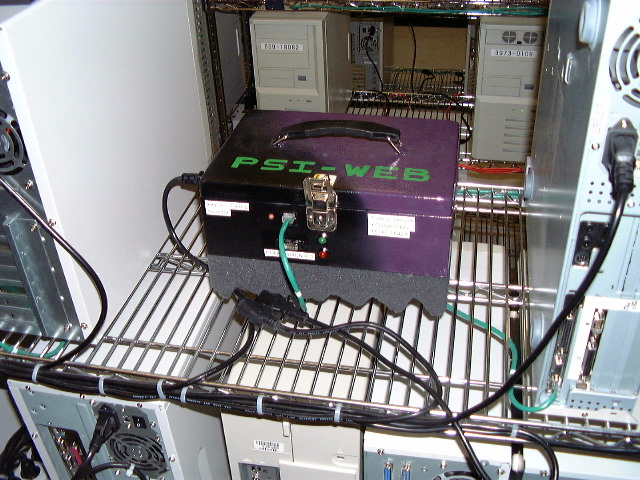 Here's my server on line. But I had to move it within our data center. The problem is that I had almost 1 year of uptime and I didn't want to lose it. Soooooo... |
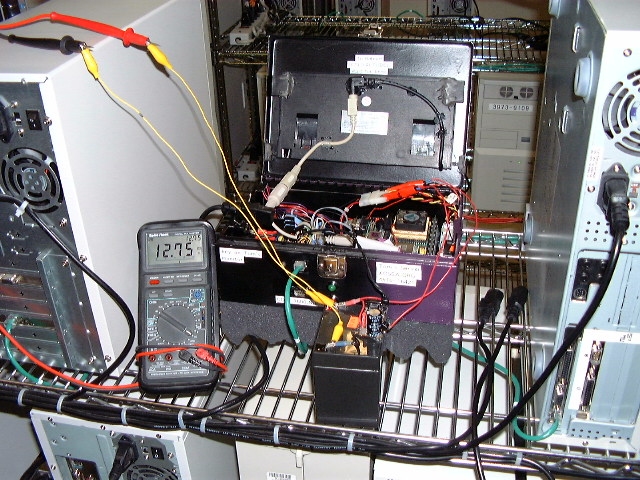 here it is.. My server disconnected from the AC (see the power connector on the right) and hooked up to my lead acid, regulated, +12V/+5V uptime transport battery hack(!). Pretty cool eh? |


 Email Tom Weeks